| Sommaire des sites JMP 4 | La proto Informatique |
Tour du Monde de Renaud |
Le Yunnan (Chine) |
La Birmanie | Le Spiti | L'Arménie | Le Gujarat |
|---|
|
Le BHS d'Olympus est un système de microscopie permettant la diascopie (fond clair), l'épiscopie (fond noir), la fluorescence, la polarisation, la LPA, le contraste de phase et le contraste interférentiel. Toutes ces techniques demandent un éclairage plus ou moins puissant qui peuvent se suffire de lampes incandescentes, mais on s'aperçoit très vite qu'il manque beaucoup de lumière (surtout en photo), que la lumière est trop rouge (2800-3200K)... Il faut donc introduire des LEDs comme source d'éclairage. Le gain sera très élevé. Le budget s'élèvera à environ 20€ ou 35€ si on s'alimente à travers le secteur 220v (ou 110v). |
The Olympus BHS is a microscopy system allowing diascopy (bright field), episcopy (dark field), fluorescence, polarization, LPA, phase contrast and interference contrast. All these techniques require a more or less powerful lighting that can be sufficient incandescent lamps, but we quickly realize that it lacks a lot of light (especially in photography), that the light is too red (2800-3200K) ... It is therefore necessary to introduce LEDs as a source of lighting. The gain will be very high. Photography or video requires light sources without black bands or other instabilities. This page will describe the replacement of incandescent lighting by power LEDs, adjustable in intensity, and without artifacts in photo-video (no chopping or humming). The budget will be around 20€ or 35€ if you use the 220v (or 110v) power supply. It is possible to power the LEDs with lithium batteries like 3S?, 4S, 5S, 6S... which is what some travelers or field enthusiasts will be looking for. |
|
Le montage se fera à l'aide de modules pré-montés, et ne requiert que quelques soudures simples. Il sera compatible avec les normes de sécurité et devrait être propre. Mais il ne subira pas les tests de conformité EMI-RFI et ESD. (cela peut coûter 50 000€!) Chacun prendra ses propres risques pour construire ce montage. |
The assembly will be done with pre-assembled modules, and requires only a few simple welds. It will be compatible with safety standards and should be clean. But it will not undergo EMI-RFI and ESD compliance testing. (This can cost 50,000€!) Everyone will take their own risks to build this assembly. |
|
L'électronique sera divisée en plusieurs blocs:
|
The electronics will be divided into several blocks:
|
Environ 30 mn (ou 20?)

|
Montage partiel: retirer les protections du plexiglas, poser les 2 poussoirs rouges et placer le plexiglas. |
Partial assembly: remove the protections of the plexiglas, put the 2 red pushers and place the plexiglas. Turn the whole, then place the 4 sides, and the base, then the 2 screws. |

|
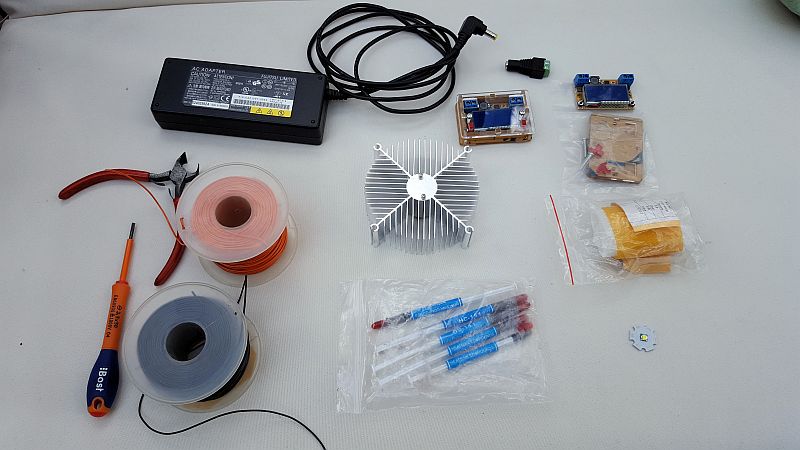
On peut apercevoir en haut un module alimentation bleu monté et un autre en pièces détachées. Ce module comporte un boîtier en plastique transparent. En dessous on peut voir un emballage pour 5 LEDs et une LED 10W seule. On remarquera au centre le radiateur qui peut recevoir un ventilateur (pour une version 4000 lumens/40W. En cours d'essai) et en dessous 5 seringues de pâte thermique (une seule suffit, mais c'est pratiquement le même prix par 5) |
We can see at the top a blue power module mounted and another in parts. This module has a transparent plastic housing. Below we can see a package for 5 LEDs and a 10W LED alone. In the center you can see the heat sink which can receive a fan (for a 4000 lumens/40W version. Under test) and underneath 5 syringes of thermal paste (one is enough, but it is almost the same price per 5) |
Chez Fasttech.com on trouve des composants peu chers.
 |
90*90*30mm Aluminium Heatsink | 90*90*30mm, for 10W LED SKU 1173705: In stock |
$5.61 |
 |
19V 3.42A Power Supply Brick / AC Adapter | 19V, 3.42A, 5.5*2.5mm: Euro Plug SKU 1660707: In stock |
$10.51 |
 |
Cree XP-L V5-2A 1186.05LM 5700-6000K LED Emitter | V5-2A, 1186.05LM, 5700-6000K, 20*1.6mm SKU 1826505: In stock |
$3.37 |
 |
Cree XM-L2 T6-3B 10W 1100LM 5000-5200K Neutral White LED Emitter on 20mm Star Base | T6-3B, 5000-5200K, w/ 20mm Base SKU 1425002: In stock |
$3.00 |
 |
Cree XM-L2 T6-4C 10W 1100LM 4200-4500K Neutral White LED Emitter on 20mm Star Base FREE SHIPPING | T6-4C, 4200-4500K, w/ 20mm Base SKU 1425000: In stock |
$3.21 |
 |
DC 5.5*2.1mm Female Jack Adapter Power Connector for LED Strip Light (2-Pack) | Female, 2-Pack SKU 4854000: In stock |
$1.00 2-pack |
| Matériel | sku | Prix | Commentaires |
| DC-DC Step Down Power Supply Adjustable Module with LCD Display / Housing Case Transparent QTY 2 Par Paypal Converter Type DC-DC Input Voltage: 5~23V (Best Voltage 20V) Output Voltage: 0V~16.5V (Continuously Adjustable) Peak Current 3A |
 |
2x €5.75 -0.19€ 6.62+1.9€ |
Permet de générer le courant d'alimentation de la LED Un seul module suffit |
| 18pcs Step Up Down Lens Filter Ring Adapter Set 37 - 82mm For Canon Nikon Metal. |  |
$8.99 | Bagues utilisées pour bien positionner la LED. Cela vous permet de faire des bagues allonges sur mesure (solution économique et idéale pour faire des essais) |
| 3 Steps Macro Extension Ring Tube FOR all nikon dslr slr uk local shipping T1 | 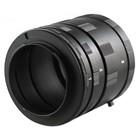 |
$4.81 | Idem J'utilise souvent des bagues en 42 mm (très peu chères) |
| 10pcs Mini MTS-102 3-Pin SPDT ON-ON 6A 125VAC Toggle Switches NEW vendeur: User ID survy2014 |
 |
$2.17 | Utile si vous comptez mettre une LED sur chaque face du radiateur (un seul suffit!) |
|
NB Les LEDs n'ont pas un CRI (rendu des couleurs) fabuleux, mais on pourra par la suite rechercher des LEDs de qualité supérieure (beaucoup plus chères) ou attendre le développement d'un logiciel de correction des couleurs. NB On pourra aussi remplacer les LEDs par de plus puissantes genre 4000 lm. Mauvaise nouvelle, l'alimentation bleue vient d'augmenter... mais ils font des promotions de temps en temps vers les 5€ |
NB LEDs do not have a fabulous CRI (color rendering), but we can then look for higher quality LEDs (much more expensive) or wait for the development of a color correction software. NB We can also replace the LEDs by more powerful like 4000 lm. Bad news, the blue power supply has just increased... but they do promotions from time to time around 5€. |
|
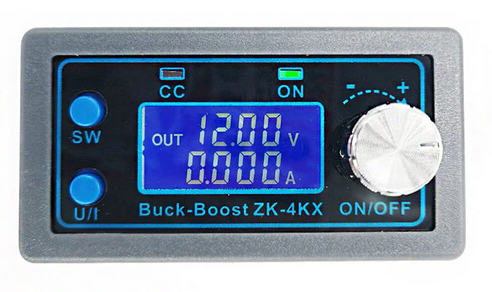
Alim maintenant trouvable chez BangGood 6.62+1.9€ On pourra lui substituer cette autre alimentation avec potentiomètre (plus facile à utiliser): ZK-4KX CNC DC DC Buck Boost Converter CC CV 0.5-30V 4A Module d'alimentation Alimentation régulée réglable pour la charge solaire Batterie: 7.11+1.77€ |
Power supply now available at BangGood 6.62+1.9€. You can substitute this other power supply with potentiometer (easier to use): ZK-4KX CNC DC Buck Boost Converter DC CV 0.5-30V 4A Power supply module Adjustable regulated power supply for solar charging Battery: 7.11+1.77€ |
 |
 |
|
L'inconvénient sera de trouver un boîtier pour mettre à l'abri l'électronique. On peut remarquer la self à tore de ferrite qui est un gage de bonne qualité (meilleure filtration de la tension: diminution de l'ondulation résiduelle) Ce montage (non essayé) devrait mieux piloter les LEDs de 4000 lm. Mais qui a besoin de 4000 lm ? (à part moi) Un microscope bien réglé ne réclame que 1 lm. Par contre si vous faites de la LPA, du DIC, du Schlieren, du Hoffman... |
The disadvantage will be to find a case to protect the electronics. We can notice the ferrite torus choke which is a guarantee of good quality (better voltage filtration: decrease of the residual ripple). This assembly (not tested) should better drive the 4000 lm LEDs. But who needs 4000 lm? (except me) A well tuned microscope needs only 1 lm. On the other hand, if you do LPA, DIC, Schlieren, Hoffman... |
|
On prendra la pâte thermique et on déposera une petite goutte (comme un bout d'allumette) de pâte à l'endroit de la LED. On placera la LED en faisant bien attention de ne pas avoir de pâte thermique sur les doigts (au risque de tacher la lentille de la LED). Fixer la LED avec les 2 vis. On préparera 2 paires de fils de longueur suffisante (80 cm) et on twistera chaque paire (noir pour le 0v et rouge ou orange pour le positif) Chaque paire de fil sera dénudée et soudée à la LED, ou à l'adaptateur de l'alimentation primaire. |
We will take the thermal paste and we will put a small drop (like a piece of match) of paste at the place of the LED. Place the LED, being careful not to get any thermal paste on your fingers (at the risk of staining the LED's lens). Fix the LED with the 2 screws. Prepare 2 pairs of wires of sufficient length (80 cm) and twist each pair (black for the 0v and red or orange for the positive). Each pair of wires will be stripped and soldered to the LED, or to the adapter of the primary power. |
|
On a donc le schéma suivant: * une paire LED <---> sortie module bleu * Une paire Alim primaire-adaptateur <----> entrée module bleu. |
So we have the following diagram: * a pair LED <---> blue module output * A pair Primary Alim-adapter <----> blue module input. |

Alimentation secondaire (module bleu, alim bleue)
Attention: le module est livré avec un réglage usine de 5 volts, ce qui va fusiller la LED.
Penser à effectuer un réglage à 0 volt avant de connecter la LED.
|
fig. Alimentation secondaire (module bleu, alim bleue) Attention: le module est livré avec un réglage usine de 5 volts, ce qui va fusiller la LED. Il y a 2x2 connecteurs pour recevoir les 2 paires de fils. De gauche à droite (panneau lisible): AlimPrimaire positif, AlimPrimaire 0V, Sortie vers LED positif, Sortie vers LED 0v. |
fig. Secondary power supply (blue module, blue power supply) Warning: the module is delivered with a factory setting of 5 volts, which will fuse the LED. Remember to set it to 0 volts before connecting the LED. There are 2x2 connectors to receive the 2 pairs of wires. From left to right (readable panel): PrimaryPower positive, PrimaryPower 0V, Output to LED positive, Output to LED 0v. |
| Paire AlimPrimaire | Paire LED |
| Orange/noir 19v / 0v |
Orange/noir 3,8V / 0v |
| Entrée du module | Sortie du courant |
|
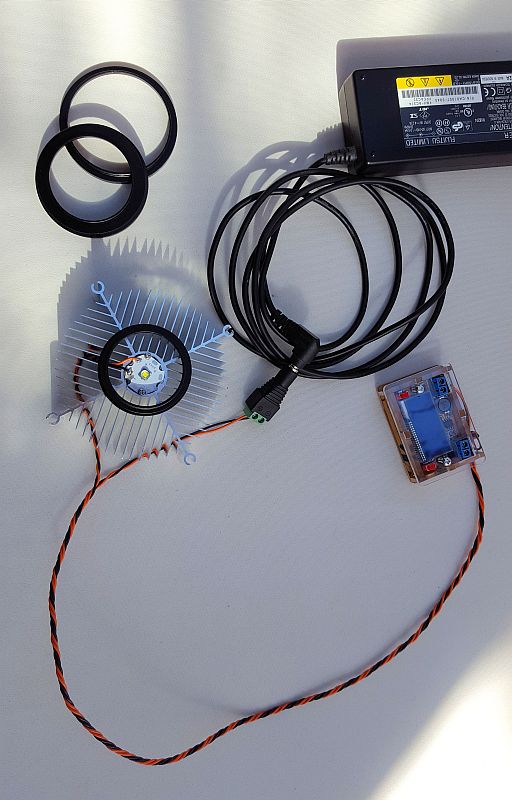
Désolé, j'ai bêtement enroulé les 2 paires pour faire plus pro. Mais on ne voit plus le câblage. On peut apercevoir sur la photo l'arrivée des bagues pour définir la distance entre le condenseur et la LED. (une sur le radiateur, et 2 ou autres prêtes à la pose. |
Sorry, I foolishly wound the 2 pairs to look more professional. But you can't see the wiring anymore. You can see on the picture the arrival of the rings to define the distance between the condenser and the LED (one on the radiator, and 2 or more ready to install. |
...

|
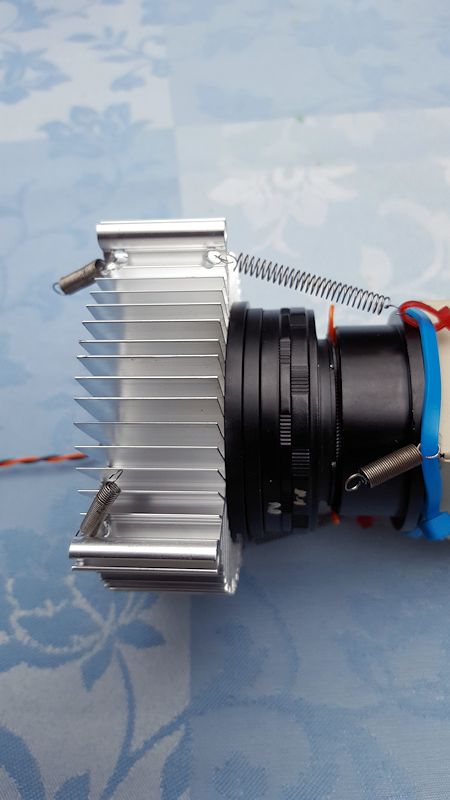
J'utilise des ressorts pour plaquer le radiateur/LED contre le condenseur. J'ai donc au préalable percé des trous dans le radiateur gris (droite), et dans la collerette noire du condenseur (gauche). 2x2 ressorts suffisent pour tenir le couple LED-radiateur. On aperçoit aussi les bagues noires qui permet de placer la LED au centre optique du condenseur -environ 10mm-. (la manipulation a décentré la LED sur l'image ci-dessus. Il suffit de glisser le radiateur) On peut prévoir des serre-câbles pour positionner le radiateur/LED de manière définitive. PS Je laisse mon bloc LED-radiateur mobile car je désire pouvoir excentrer la LED pour mes travaux en lumière rasante. |
I use springs to press the radiator/LED against the condenser. I drilled holes in the grey radiator (right), and in the black collar of the condenser (left). 2x2 springs are enough to hold the LED-radiator couple. You can also see the black rings that allows you to place the LED in the optical center of the condenser -about 10mm-. (the manipulation has decentered the LED on the image above. We can provide cable ties to position the radiator/LED permanently. PS I leave my LED-radiator block mobile because I want to be able to off-center the LED for my work in grazing light. |
| Le besoin de lumière se fait surtout sentir en LPA (lumière polarisée analysée). Je vais donc effectuer une série de mesures dans ce mode:
|
The need for light is especially felt in LPA (analyzed polarized light). I will therefore make a series of measurements in this mode: - LED 10W XM-L T6 on a 90mm diameter radiator (see components list) - LPA at the darkest and obtain a deep blue/violet with a birefringent plate - ISO 200 - Room temperature 19.0°C - Flip-top condenser - Head sending 25% of light to the eyepieces and 75% to the sensor (Samsung S6 through an eyepiece) - 40x Splan lens |
| Intensité LED, Ampères |
Tension LED, Volts |
Température radiateur, °C |
Vitesse LPA, Obj 40x |
Bright field |
| 0.46 | ? | 21.8 | 1/15 ? | 1/500 |
| 1.06 | 3.13 | 25.2 | 1/30 | 1/2000 |
| 1.55 | 3.32 | 26.8 | 1/90 | 1/3000 |
| 2.09 | 3.46 | 29.3 | 1/125 | 1/4000 |
| 2.55 | 3.61 | 35.0 | 1/180 | 1/8000 |
| 3.05 | 3.78 | 46.0 | 1/180-500 | 1/12000 |
| On notera l'énorme approximation concernant les vitesses où il peut y avoir plus d'un facteur 2 d'erreur de lecture/estimation. Il est très difficile de régler à vue l'appareil. (pas de cellule à disposition) Des mesures en DIC donnent approximativement le même résultat. Notez que je n'envoie que 75% de la lumière au capteur. Des mesures effectuées avec un objectif 10X donnent des vitesses presque 10x plus rapides. Les températures ont été mesurées à l'aide d'un capteur métallique (en forme de cylindre) inséré dans les ailettes du radiateur. Ne pas oublier que je ne suis qu'à 200 ISO. Avec un reflex on peut monter facilement à 1600 ISO, ce qui assure un facteur 8x supplémentaire pour les vitesses. |
One will note the enormous approximation concerning the speeds where there can be more than a factor 2 of error of reading/estimation. It is very difficult to adjust the device by sight. (no cell at disposal) DIC measurements give approximately the same result. Note that I only send 75% of the light to the sensor. Measurements made with a 10X lens give almost 10x faster speeds. Temperatures were measured with a metal sensor (cylinder shaped) inserted in the fins of the radiator. Don't forget that I am only at ISO 200. With an SLR you can easily go up to ISO 1600, which provides an additional 8x factor for speeds. |
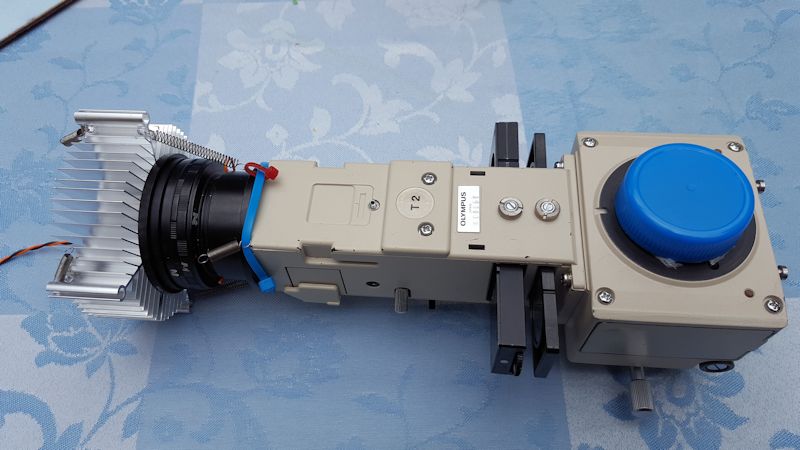
fig. Un module UMA converti en éclairage LED 10W (10W et 36W --> 1000lm et 4000lm)

|
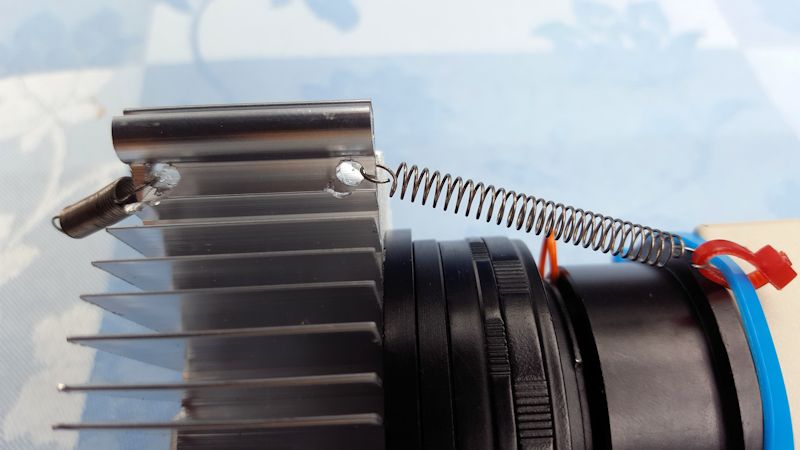
Détails des bagues d'adaptation noires (mixte de bagues rallonges et changement de diamètres), des trous dans l'aluminium recevant les ressorts, du serre-câble bleu passé avec art (délicat) pour obtenir un support des ressorts (via les petits serre-câbles oranges) |
Details of the black adapter rings (mix of extension rings and diameter change), of the holes in the aluminum receiving the springs, of the blue cable tie passed with art (delicate) to obtain a support of the springs (via the small orange cable ties) |


|
fig. Détails de l'interrupteur bleu commutant une LED 10W (1 puce) ou une LED 36 W (4 puces) (l'ensemble était hors possibilité de réglage) Le module UMA étant ouvert (6 vis à retirer. pas de piège) Noter la présence du dépoli blanc laiteux, qui recevra l'image nette de la puce LED. PS J'utilise des bouchons de bouteille (ici orange, noir ou bleu) pour protéger les entrées/espaces optiques |
fig. Details of the blue switch switching a 10W LED (1 chip) or a 36W LED (4 chips) [it remains to re-fix it, because the initial assembly prevented the adjustment of the position of the LEDs] The picture on the right shows a red cable clamp (a shim) used for centering the diaphragm and the frosting (The UMA module being open (6 screws to be removed. No trap) Note the presence of the milky white frost, which will receive the clear image of the LED chip. PS I use bottle caps (here orange, black or blue) to protect the optical inputs/spaces |
|
Il y aura 2 réglages à faire: |
There will be 2 adjustments to make: 1- find the distance between the LED and the condenser (Z). Take rings to get about 10-12mm. I had to put (to check) a 7mm macro ring and 2 rings of 2mm and 1 thread. The goal is to obtain a square on the ground. 2- Center the LED by moving the radiator in X or Y. Remove the cover of the filter box, and locate the frosted filter. We turn on the LED at low power to not be dazzled. And we move in x, y the radiator to place the square in the center of the frosted filter. Very simple to do. See video (coming soon) |
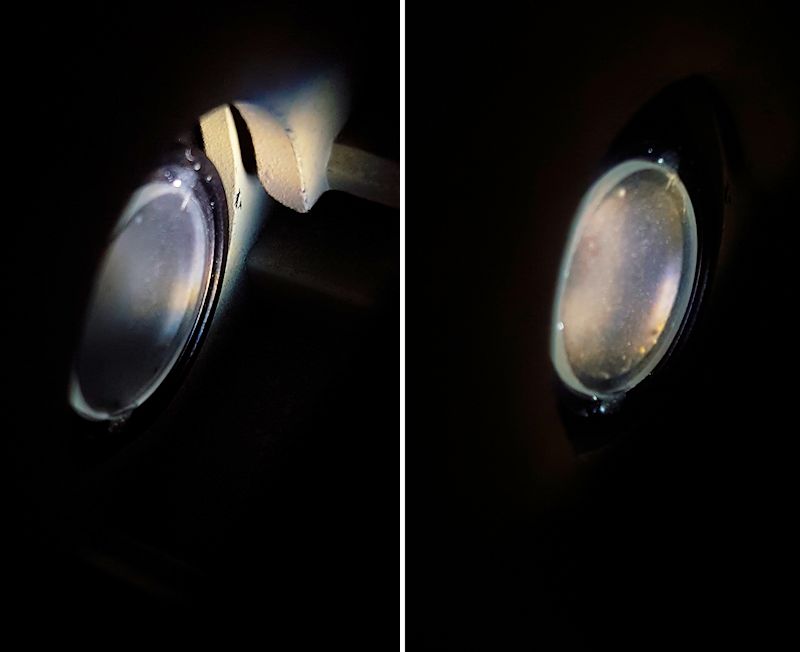
Mal réglé Bien réglé
|
On notera qu'une LED XML-T6 ou L2 ne donne pas un carré recouvrant la totalité du dépoli. Cela indique que la LED est trop petite. On préfèrera une LED 4 puces (ref à indiquer. En cours d'essai) |
Note that an XML-T6 or L2 LED does not give a square covering the entire frosted area. This indicates that the LED is too small. We prefer a 4-chip LED (ref to indicate. Under test) |
|
Quand la LED est bien positionnée, un écran mis derrière le diaphragme d'ouverture montre un éclairage de toute la surface des lentilles. Pour cette manip, il faut évidemment démonter les 6 vis du module UMA. Le reste des tests consiste à mettre le barillet NEO et d'effectuer des tests virtuels. Que de lumière y compris en DIC, et DF dark field ! La LED 36W améliore le DF. Car le cylindre d'éclairage est uniforme et complet. Mesures à faire ... Sigles:DF dark field
DIC contraste interférentiel NEO gamme d'objectifs pour epi-scopie (éclairage par le dessus) |
When the LED is well positioned, a screen put behind the aperture diaphragm shows an illumination of the entire surface of the lenses. For this manipulation, it is obviously necessary to remove the 6 screws of the UMA module. The rest of the tests consists in putting the NEO barrel and to carry out virtual tests. What light including DIC, and DF dark field ! The 36W LED improves the DF. Because the lighting cylinder is uniform and complete. Measurements to be made tbd ...
Acronyms: DF dark field
DIC interferential contrast NEO epi-scopy objective range (top illumination) |
|
On peut prendre des LEDs blanches riches en bleu (genre 7000K ou plus) qui seront utilisables en bleu et en vert. Mais on peut aussi placer sur un radiateur une LED bleue Royal (adaptée au filtre B) sur un coté, et une LED verte (adaptée au filtre vert) de l'autre coté. Malheureusement impossible de trouver des LEDs bleue ou verte de 10W. |
We can take white LEDs rich in blue (like 7000K or more) which will be used in blue and green. But we can also place on a radiator a Royal blue LED (adapted to the B filter) on one side, and a green LED (adapted to the green filter) on the other side. Unfortunately it is impossible to find 10W blue or green LEDs. You will find below a RFCA equipped with a Royal Blue LED and a Green LED. The switch allows to switch from one LED to the other, but it also requires to turn the radiator over. Here we see a quick (and crappy) attempt to hold the radiator. The solution found for the UMA is much better and will be carried over to this module (holes in the radiator, and 2 springs on each side) |


L'ensemble équipé en Bleu Royal et Vert Bidouille pour tenir le radiateur (inter Blanc/Vert)
(euh... j'ai fait qqchose de plus propre depuis!)


Pas de vis livrées cette fois... Bidouille pour tenir le radiateur
J'ai utilisé ici des bagues rallonges de 14 et 28 mm (à vérifier)
|
Juste pour voir ce que cela donne... |
Just to see what it looks like... Royal Blue lighting, 1.5A, obj 10x I'm just looking to show the amount of light. |
 Résidus d'eau évaporée 1/30 |
 Sang séché 1/250 |
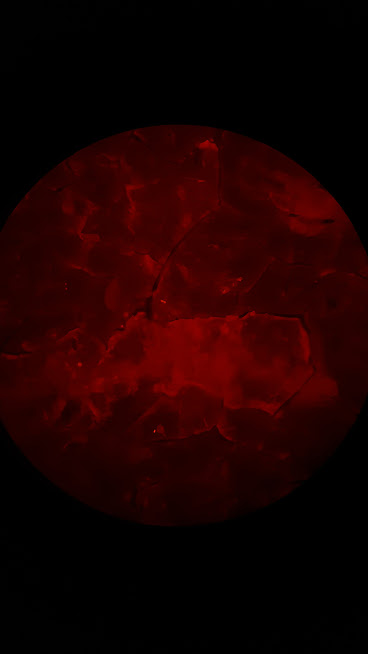 Sang séché 1/250 |
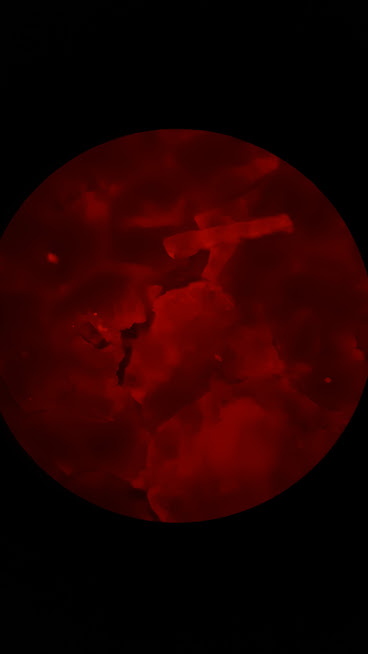 Sang séché 1/350 |
 Sang séché 1/500 |
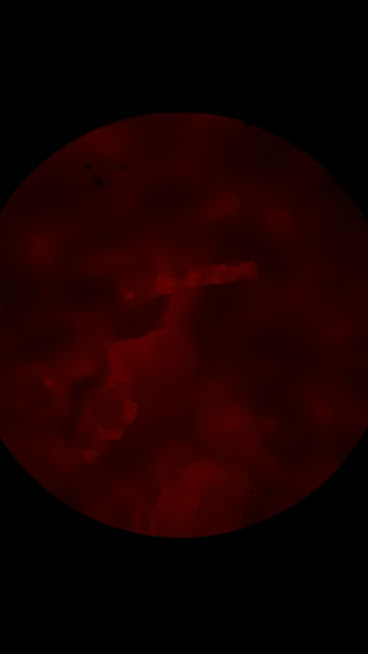 Sang séché 1/500 |
|
Les images vertes montrent une excitation avec du bleu royal. Le fitre visuel laissant passer le vert,... le rouge (bloquant donc le bleu) Les images rouges montrent une excitation avec du bleu royal (mais en éliminant le bleu profond, ce qui donne plutôt un cyan). Le fitre visuel laissant passer le rouge (bloquant donc le bleu et le vert) J'obtiens plus de lumière avec de forts grossissements. (ex 40x, 100x) |
The green images show an excitation with royal blue. The visual window letting through the green,... the red (thus blocking the blue) The red images show an excitation with royal blue (but by eliminating the deep blue, which gives rather a cyan). The visual window letting through the red (thus blocking the blue and the green) I get more light with high magnifications. (ex 40x, 100x) |
|
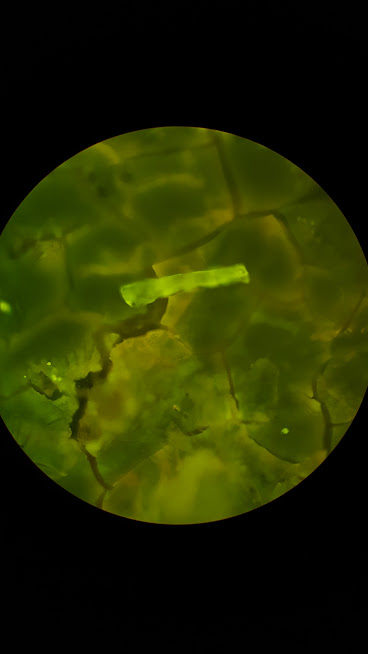
Juste pour voir ce que cela donne... Eclairage Vert, 1.5A, obj 20x, 200 ISO, Splan. Je cherche simplement à montrer la quantité de lumière. Images non traitées. |
Just to see what it looks like... Green light, 1.5A, obj 20x, ISO 200, Splan. Just trying to show the amount of light. Unprocessed images. |
 Bouchon, LED verte, filtre bleu 1/20 |
 Pollen, LED verte, filtre bleu 1/125 |
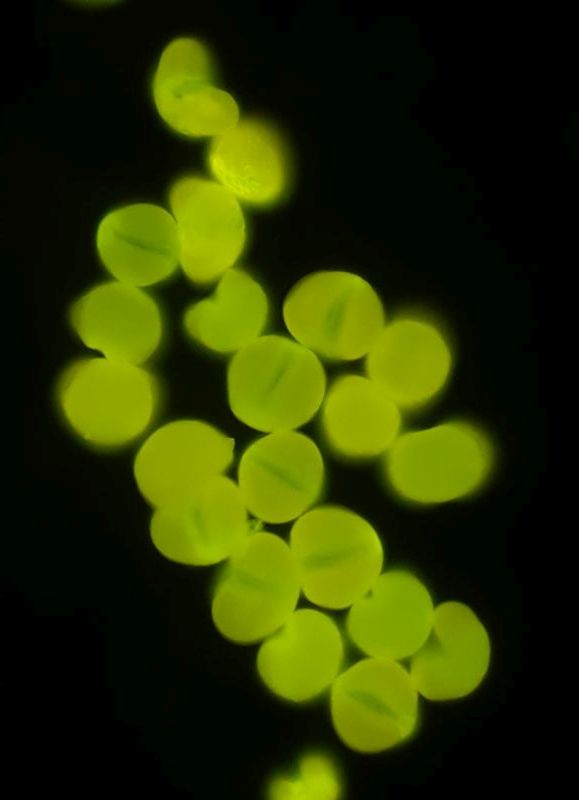 Pollen, LED verte, filtre bleu 1/90 |
 Pollen, LED verte, filtre vert 1/90 |
|
On peut remarquer que la fluorescence rouge est moindre. Les images sont un peu floues dû au fait que j'ai eu la flemme de mettre des objectifs métallographiques. Ce sont de simples dépots sur lames (sans lamelles) Les couleurs données par les LEDs ont des spectres qui ne sont pas étroits. |
One can notice that the red fluorescence is less. The images are a bit blurred because I was too lazy to use metallographic lenses. These are simple deposits on slides (without lamellae) The colors given by the LEDs have spectra that are not narrow. |
|
Je n'ai pas eu le temps d'effectuer des mesures. Comparaison LED blanche, verte, bleue.. à faire... Il reste à trouver des LEDs de fortes puissance, car je n'ai trouvé que du 3W voir 5W (mais qui n'est peut-être qu'une 3W) Je dispose d'un autre radiateur équipé en LED 40W blanche (tests et mesures à faire) |
I have not had time to make measurements. Comparison white LED, green, blue ... to do ... It remains to find LEDs of high power, because I found only 3W or 5W (but that may be a 3W) I have another radiator equipped with 40W white LED (tests and measurements to do) |
|
J'obtiens vraiment beaucoup de lumière pour l'auto-fluorescence, surtout en bleu (vision verte) La LED blanche évite de changer de radiateur/couleur lors des examens. C'est très pratique. Je n'ai pas eu le temps d'effectuer des mesures. Comparaison LED blanche, verte, bleue.. à faire... |
I really get a lot of light for auto-fluorescence, especially in blue (green vision) The white LED avoids changing radiators/colors during exams. This is very convenient. I did not have time to make measurements. Comparison white LED, green LED, blue LED... to do... |